Physical Address
304 North Cardinal St.
Dorchester Center, MA 02124
Physical Address
304 North Cardinal St.
Dorchester Center, MA 02124
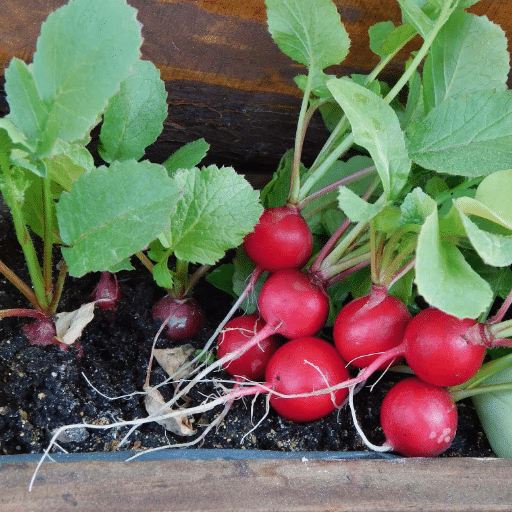
Growing your own vegetables doesn’t necessarily mean you must have a large garden—radishes, for instance, can be grown well in pots. The choice of whether to have a small garden or if you are just trying to have fun with small gardens, growing radishes in containers is a simple and satisfying way of having fresh home-grown vegetables. This practical guide will provide you with and show you every step of the way—from picking the most appropriate pot and soil to looking after your radishes throughout their growing process. Therefore, it is time for you to reveal the mysteries of container gardening and have your own radish harvest with all its crunchiness and pepperiness!
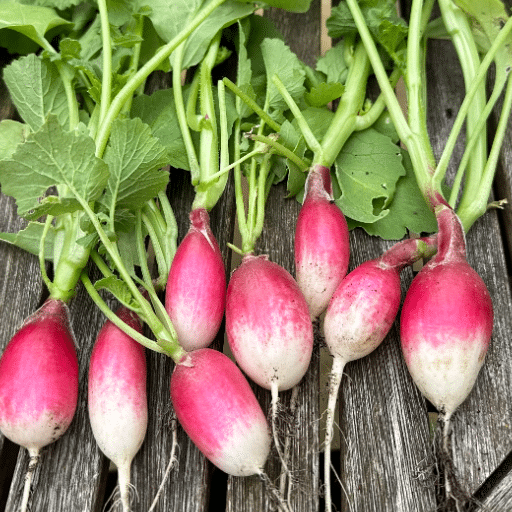
The most significant factors to consider when picking a container for radishes are size and drainage. A pot that is at least 6-8 inches deep should be used so that the tubers have enough room to grow properly. The pot should have holes at the bottom for draining, so there is no standing water that can damage the roots. Wide pots are great for planting several radishes because they allow you to sow them in rows and provide the necessary space. Preferable materials are plastic, ceramic, or terracotta, which hold moisture just enough to keep the plants without getting too wet. The right pot will create the right conditions for your radishes to flourish.
When choosing the pots in which to grow the radishes, you should choose at least containers that are 6 inches deep to provide root. Allow drainage holes in the pots to prevent waterlogging and use plastic, ceramic, or terracotta for the pots, which retain moisture well but do not oversaturate the soil. Wide pots are suitable for planting multiple radishes in rows, providing enough space for the best growth.
Good drainage is the key to growing radishes in pots successfully. The roots may die if they get too much water and this will result in unhealthy plants. To stop this from happening, make sure the pots have enough drainage holes at the bottom to let the extra water drain away. Also, use a soil mix that drains well, such as one made of potting soil and sand or perlite, so that the water does not stay at the bottom of your pot but at a level which is good for the radish plants. How often you water is also important; keep the soil always a little moist but not too wet.
Fully exposed to the sun is the best place for growing Radishes as they require six hours of full sun per day for the best growth. They can also grow in partial shade but their growth will be slower so it is not worth it. When planting among other things, radishes may be good for small gardens or pots, as they only require a couple of inches between each plant. Space rows about 6-12 inches apart so that there is enough room for the growth of roots, easy care, and no competition. Done this way, even the smallest areas will have no issues growing Radishes.
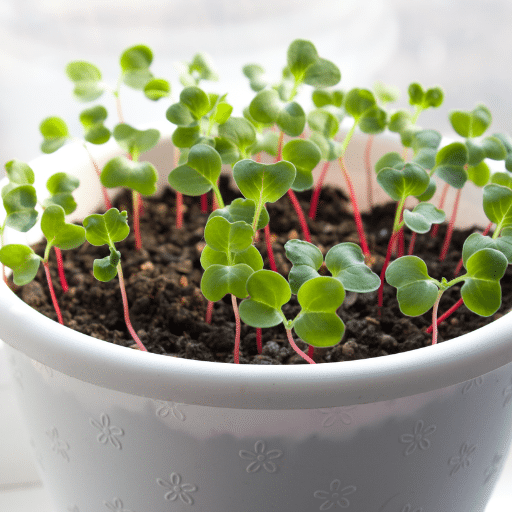
Radish growing in pots is an uncomplicated and productive method. First, take a pot that has a minimum depth of 6 inches and is equipped with proper drainage. After that, put in the pot a mixture of soil that is rich in nutrients and has good drainage. Then, put the seeds at a depth of 1/2 inch and a distance of 1 inch apart from each other. Keeping the soil moist at all times, water it lightly but do not let it get waterlogged. The container should be placed in a warm, sunny area for the best results. If necessary, thin the seedlings to keep the right distance and support the roots properly. Radishes can be pulled out when their ideal size, usually in about 3-4 weeks, is reached.
The period of sowing radishes varies according to the climate and conditions of growth, but they are greenhouse to cooler weather. They can be sown right after the snow melts, in early spring, and successive plantings can go on every two weeks until late spring. For autumn crops, radishes should be planted again in the period of late summer to early autumn according to the frost date in your region. Do not plant in the middle of summer in hot climates, as the high temperature will make radishes bolt and lose their flavor. Always check your local growing zone for the most accurate timing.
To create the best soil mixture for radishes, first of all, have the soil loose, well-drained and rich in organic matter. To improve fertility and texture, add compost or well-rotted manure and check the soil’s pH, it should be from 5.8 to 6.8 for the best growth. Do not use heavy or stony soils, as they may cause the roots to be deformed. If necessary, turn the soil over to a depth of 6-8 inches to enable roots to grow properly. Finally, the land should be cleared of all weeds and litter so that your radishes are not competing for light and space.
The best way to plant radishes is to separate the seeds by 1 inch in between and rows 12 inches apart, this way there will be no problems with plant growth and still get good circulation of air around the plants. The seeds should be sown at the rate of 1/2 inch and then very lightly covered with soil. Planting seedlings too close can result in weak root systems, so thinning will have to be done if needed. It’s important to follow the recommended spacing guidelines for your specific radish variety to fully take advantage of the growth and harvest yields.

Radishes are suitable for a cool climate and the best temperature for their growth is between 50°F and 70°F. They need full sun but won’t mind being shaded a bit. The moisture should drain off well and be of only organic matter, and the pH should be at 6.0 to 7.0. Watering evenly but consistently prevents crack and odorous roots. Avoid hot weather when planting radishes as it will lead to poor-flavored, bolted plants.
Indoor radishes demand a lot of light if they are to grow well. They require a daily least of 6 hours of direct sunlight which could be gotten by either locating them close to a window that gets plenty of sun or providing them with light from grow lights. Full-spectrum LED grow lights are perfect for this purpose because they imitate natural sunlight and give out the necessary wavelengths for good growth. Keep the lights 4 to 6 inches above the plants and change the height as the plants grow and also be sure they are on for 12 to 16 hours a day to help the plants grow to their full potential.
Container-grown radishes need regular watering to live. The earth must be kept moist uniformly but not to the point of water logging; too much water can cause the roots to rot. Watering when the first inch of the soil on the surface has dried out is the best practice because that gives the water a chance to get to the roots deep down in the soil. During summer, constant checking is important because the soil in the container tends to dry out faster than in the garden bed. Always use containers with good drainage to prevent water from accumulating and also think about mulching to keep the soil moist and the temperature steady.
Radishes prefer a cool climate and an ideal temperature range of 50°F to 70°F. Most cultivars like these conditions, as very high temperatures can cause them to taste bad and bolt. Ideally, radish planting should be done in early spring or fall when the weather is not too hot or cold. If the growing is done at warmer times, then laying off the plants’ hottest parts of the day has the possibility of keeping the plants in the right conditions. Knowing the specific radish varieties’ temperature range helps to ensure the steady growth and the success of the harvest.
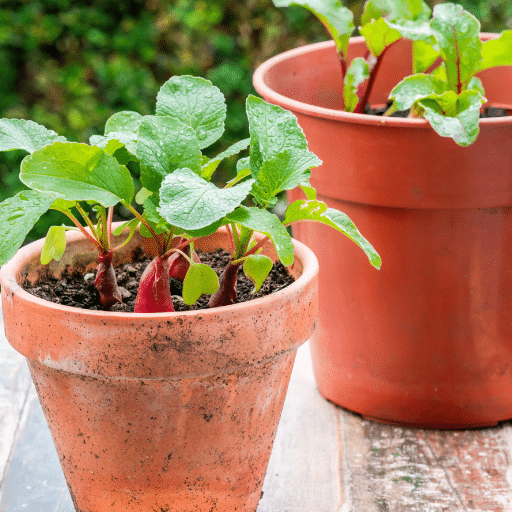
In case the radishes in containers are infested with pests, the plants need to be regularly checked for the presence of aphids, flea beetles, and root maggots. Manually remove insects that can be seen or wash them away with a powerful jet of water. Use row covers as a barrier to keep pests off the plants, and make sure the soil is not too wet so that fungal gnats won’t be attracted. Neem oil, or insecticidal soap are some of the organic treatments that are capable of eliminating infestations effectively. Besides, keeping the containers tidy plus getting rid of the plant debris will also lessen the chances of pest problems.
Radishes are not immune to an array of insects and other small pests, such as aphids, flea beetles, root maggots, and fungal gnats. Water spraying and neem oil application can control aphids, and using row covers will keep the flea beetles away. By using the measures of well-drained soil and cleaning the area free of roots and decayed plants, one can get rid of root maggots. The solution to fungal gnats is the same as for overwatering—proper watering and ensuring good drainage of the soil. Regularly doing a check-up of the plants and taking out any pests or dead plant material from the vicinity will not only prevent but also help keep the radishes healthy.
Introduction of natural remedies for pest control can be amongst the most powerful methods, while at the same time keeping the plants safe and free from chemicals. Watering plants with a very strong jet of water or applying neem oil are two options with which the gardener can take control of the aphid population quite rapidly. The plants of the flea beetles’ victims can impress the enemy by using a physical barrier called row covers. The rabble of root maggots is easily managed by the precaution of giving the soil good drainage and cleaning the area of any decaying plant matter. Fungal gnats are kept at bay with proper soil drainage, and less watering. Regular checks of your plants, eliminating the visible pests, and destroying the infected plant material are essential practices for your garden to be healthy and thriving.
For both strong growth of plants and no encounters with gardening troubles, it is absolutely important to combine the right preventive measures with up-to-date knowledge. As for the latest recommendations, one of the best soil management practices is to carry out the soil management thoroughly. Testing the soil for pH and nutrients gives the grower the power to create conditions that are perfect for the particular plants. Compost and organic fertilizers not only make the soil richer but also create a conducive environment for microorganisms which in turn helps in root development.
Moreover, mulching is still the most frequently practiced for good soil moisture retention and weed-control. Crop planting at the right distance apart increases airflow around the plants, thus lessening the chances of getting fungal infections. The practice of companion planting—plants that drive away pests by their mere presence—has also become popular. For instance, Google searches show a marked increase in this area of gardening through the company’s trends. For example, marigolds will keep root nematodes away and basil will repel aphids and whiteflies.
Last but not least, the use of advanced technologies such as mobile apps for plant care and online pest detection guides can help to take the necessary actions before the situation becomes problematic. This combination of practices and tools provides the best application for a ready gardener capable of tackling the challenges and harvesting a bountiful garden.
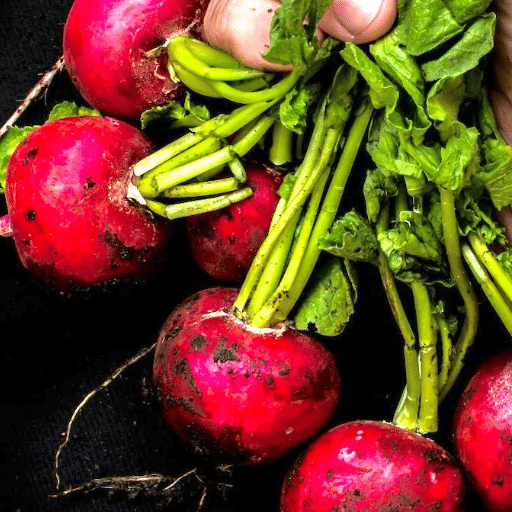
The process of radish harvesting is not complicated, yet it relies on the right timing and careful watching. In general, radishes will be ready to harvest around 3-4 weeks after being planted, but this period may vary according to the variety. To determine the size of the radish bulb, carefully remove the soil from around its base. You can pick them when they have attained their expected size of about 1 inch in diameter. If they stay in the soil for a long time, they rot, and the crispness of the texture will also be lost. To harvest, hold the greens firmly close to the ground and pull them up with equal force and gentleness so that the roots are not hurt. For the best flavor, wash and eat them raw.
Radishes are ready for harvesting when the bulbs have reached the desired size—usually about 1 inch in diameter, depending on the variety. You can confirm it by very carefully brushing the soil away from the base to see how much they have grown. The top of the bulbing radish should be slightly visible above the soil level, and the leaves should be green and healthy-looking. Do not let them stay in the soil for a long time since this might make the radishes tough, woody, and devoid of the crisp, fresh taste that comes with them.
Harvesting radishes properly involves using a garden fork or your hands to gently loosen the soil around the plant’s base to prevent the root from being damaged. Grasp the leaves close to the soil line and pull upwards with enough force but very carefully to remove the radish from the ground. After harvesting, if you plan to store the radishes, brush off any excess soil without washing them. For the best flavor and texture, harvest them when they have reached the right size and use them right away in your recipes or salads.
Proper post-harvest care is a must for radishes to last longer and taste better. First, remove the leafy tops since they tend to draw moisture away from the root and, thereby, cause it to lose its freshness rapidly. For maintaining their crispness, keep the roots unwashed in a plastic bag or airtight container in the refrigerator, and the ideal temperature range is 32°F to 40°F. In case you have to clean them before use, give them a gentle rinse under cool water and dry thoroughly. Well-stored radishes can stay fresh for two weeks at most, which is a great opportunity for you to use them in various kinds of dishes, as they are very flavorful and versatile.
To grow radishes inside, a container that is a minimum of 10 to 12 inches deep is required to support the roots. It can be fabric or pot, both types permit good drainage and hence are suitable. Picking a container with enough area for the radishes to grow without trespassing on each other’s territory is very important. The container that is selected should be equipped with drainage holes to stop the accumulation of water and the sporadic water supply will keep the soil moist. It is a must to use a high-quality potting mix with nutrients for the healthy growth of the plants. And for those who are space-constrained, grow bags can be a wonderful asset.
Planters have to have nitrogen-rich soil for seedlings to germinate in a container, start by making the soil in the container of your choice with the good potting mix. The seeds need to be sown a couple of inches apart in order to get enough room for growing. Seedlings should be covered gently with soil and given a good watering, keeping the soil moist but not soaked. Create a location for your container where it will receive at least 6 hours of sun a day, as radishes demand a lot of light for proper germination. Usually, germination lasts between 5 and 10 days, of course, it depends on the variety.
There are the Cherry Belle, French Breakfast, and Watermelon Radish as indoor-friendly types of radishes. Apart from their flavors and colors, the Cherry Belle and Watermelon Radish are the most fun to grow because of their easy and fast maturity, respectively. The French Breakfast is a little longer, having a mild taste as well. Watermelon Radish not only has delicious white flesh but also the most flamboyant pink skin. From the different radish varieties you will be experimenting with, a whole spectrum of flavors and stunning appearances will be available in your kitchen.
The primary method for warding off pests from indoor-grown radish plants is cleanliness of the growing area. Occasionally, plants should be inspected for any signs of pests and affected leaves should be promptly removed. A floating row cover can be the solution to the pest problem since they will not be able to access your radishes in this case while light and moisture will still be able to reach them. Furthermore, good air circulation will always be to your indoor garden’s advantage as it will help keep the pests away. The soil should be kept in a healthy state and well-maintained to ensure that the strong plants will not become attractive targets for the pests.
Radishes are best harvested when they are fully grown, which usually takes 4 to 6 weeks from planting, depending on the variety. One inch in diameter is generally the measuring point for mainstream radishes to be considered as harvested. However, it is important to check frequently because the radishes will either bolt or become woody if left too long. Harvest the radishes with care, pulling them out of the soil only if the roots of other plants won’t be damaged. Who could resist the thrill of gifting fresh radishes from your container garden to yourself?